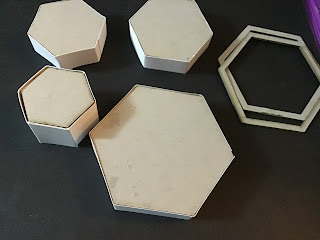
Today I am goung to show you how i made a bird bath using the fabulous Hexagons pack. The packets contain so many different sizes with solids and frames that you really do have a lot of different options for creating. These are ideal for 3d projects as the greyboard is very sturdy and of a thickness that allows for them to be taped and glued on the edges
I chose the largest hexagon for my base and a range of differing smaller sizes to construct the bird bath itself. I needed a pair for the base, a pair for the column, two pairs for the water receptacles and
A final pair for the supporting column between the baths
I also had a stack of frames in the same sizes as the water receptacles to build up my bath sides
Staring with the largest pair, i measured one side of the hexagon and cut a strip of 300gsm card 6 times that length plus a little extra as an overlap
I ran red liner taper along both the top and bottom edges
I peeled back the red liner and adhered my card to the outer edges of one hexagon
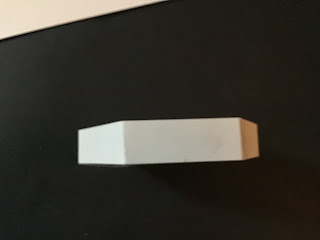
As you can see in the above picture, i stuck four sides, it is by far the easiest option to slot your second hexagon in now rather than sticking completely and trying to insert the second on the top, if it falls all the way in its a pain to get out
The aim is to make a solid structure almost like a drum
Repeat the process for the two colums and the hexagons that are going to be used to create your water receptacle
Using good pva glue i started to assemble the now 3d elements and added the hexagon frames to build up the walls of my bird bath
Using a palette knife i proceeded to cover the entire structure with texture paste, paying particular attention to the walls of each bath as i needed it to be completely encased to avoid any leakages later when the “water” was added
Make sure the column is well covered as this provides overall support
Glue structure to your main base
When dry paint according, i used decoart paynes grey fluid acrylic paint with titanium white dry brushed on over the top to bring out texture from the paste as i wanted an old stone feel but you could go for yellow sandstone if you wished
To create the water effect i filled my baths with Decoart extra thick top coat coloured with turquoise shimmer and then used a hot glue gun to create water splashes over the sides, once dried i painted over with a blue shimmer paint
I added some grass tufts and moss from my stash to add the finishing touches, all it needs now is a couple of birds!!
Hope you all enjoyed this project and i hope you will all try taking your makes off the page and have a go at creating something 3d x x x
I used


No comments:
Post a Comment