Search This Blog

Saturday 2 April 2022

“Hex” Deck Saturday!


I thought is would be fun to give our “Hex - Tech Tuesdays” a whole new meaning, so today I have for you all “Hex Deck Saturday”


This project has been created as a Magik Graphics Sample, but as Tando substrates are my go to product regardless of who i create for Di has kindly let me share it with you all here


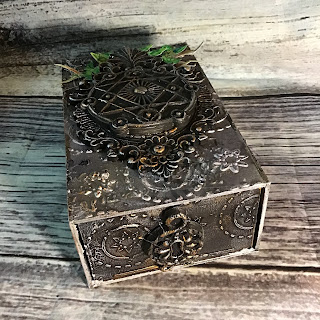
I have used one of the fabulous Tando  deep match boxes and inserts to create this project. I first glued the appropriate pieces together to make up one drawer and one sleeve, using a good PVA glue


I used Decorart Carbon Black Chalk paint to base coat all surfaces, inside and out, when dry i used Decoart Gel Medium through the brand new Omniscient Stencil on the top of the box and drawer ends, and the Alchemist Memoirs for the bottom and sides and left to dry 


Once dry i highlighted the raised surfaces using Decor-art  etalluc Lustre Silver Spark

I had previously cast a resin frame and embellishment using moulds from Prima and Stamperia, and gave them a coat of black paint, once dry i adhered these to the top of the box using a glue gun and highlighted again with the silver lustre topped with Copper Kettle Lustre


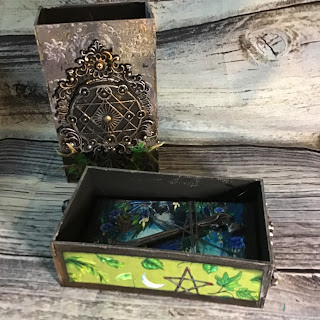
I used a mix or printable images from the Magik Graphics Autumn Reigns and Wheel of the Year Cdrom’s to line the outer sides and inner base of my box


I the used additional images to create my “Hexes” which were adhered to each insert using Decoart matte medium


I used wax string to bind resin bones and twigs to each of my inserts


And highlighted any raised detail and the edges with the same silver metallic lustre


All my hexes fit securely inside my box!

I would love to see your version of this project, please share if you decide to have a go x x

Products i used
Autumn Reigns, Wheel of the Year cdroms and stencils available from


Tando light up advent scene box


Another Tando Advent box and this one is rather special, it may even warrant taking pride of place as your Christmas Day box!
This Light Up Advent box is a present within its as there isn’t really room to get anything inside!


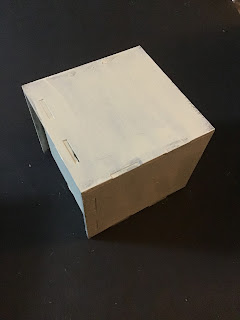
First, lay all your pieces out and establish their correct position before gluing with a good PVA
As highlighted in previous Advent blog posts, you will have and outer box and inner drawer, each to be assembled separately

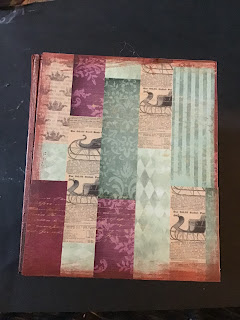
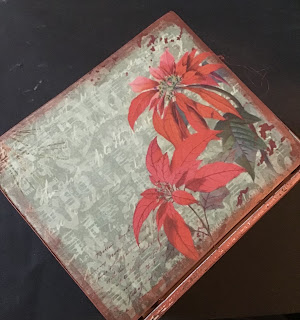
I started by base coating both box and drawer with DecoArt Vintage Chalk paint, then cut squares of decorative paper to adhere to the sides and top of the box using DecoArt Matte Medium


Top view


I done exactly the same to the drawer front using more of a focal image from the same paper pack, and then set it aside


I glued together the rest of the drawer but left the front panel off as i knew this was going to be a 3d layered project and leave the front panel off would give me much easier access. Base coat in the same Vintage paint


I used my hole punch to pinch away a tiny recess that would house the wiring for the lights, you could just snip away with the pointy end of a pair of scissors if you have got a small punch, all you need is a little notch taken out to allow everything to sit flush when assembled


The base of the drawer, by nature of its design, is set in a little, giving you the perfect place to conceal the battery pack with no hindrance to sliding the drawer in or out, glue this in place using hot glue or red liner tape


It is very easy to spiral your lights round starting with the light closest to the battery pack, place along the outer edges working in towards the middle, i we t side, bottom, side, back, side, bottom, side, back, using red liner tape to hold the wire in place as i went, keep going until all lights have been secured


Cut four panels from paper pack and adhere to conceal lights, it is so much easier if you use red liner tape for this


I wanted my elements to appear 3d, so to give dimension and to secure pieces in the middle of the box, i glued the ends of strips of thin card together and creased to form a cube, this i glued to the back of my elements, i can then glue the back of that cube either to the walls or back of my box or to another element creating lots ff depth and layers, this creates the illusion of your pieces seeming freestanding


Build up your layers as little or as dense as you like


When all your pieces are in place glue your drawer front into position, the drawer front also acts as the base or floor of your piece as the idea is to pull the drawer out then flip towards you to see the scene

Dont forget to finish off by going round all your box and drawer edges using DecoArt Metallic Lustre in Copper Kettle for that final touch!


Switch your lights on and display


Hope you have all enjoyed making this as much as i did, tag me in your finished projects, i cannot wait to see what you do with yours x x

I used

Red liner tape
Decorative papers


Saturday 19 February 2022

Tando Twirly Whirly Art Stand - No 2


This morning i have another Tando Twirly Whirly Art Stand for you all to enjoy!
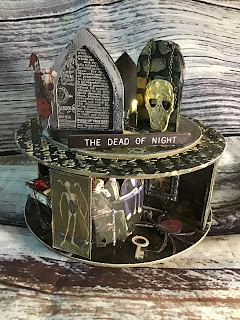
Again this one has a gothic theme but you can make yours whatever you want, the only limit is your imagination

The Twirly Whirly Art Stand is very easy to put together, it is also adaptable to accommodate lights. My last stand had lights in the bottom, this one is going to gave lights in the top


First, use a good PVA glue to stick all three rings together, and glue to base, oleave to dry and clamp if necessary or leave to dry under a heavy book


Of the two circle pieces with a hole in the centre, select the one with the largest hole and insert the bolt through the centre
Then glue that circle to the top of the rings leaving the bolt in situ

Di has done a very easy to follow video of the Twirly Whirly construction which you can view on the Tando Creative YouTube channel, my version differs slightly in that the spacers that go on top, i have used next, they need to be added and cant be left out, to get the correct tension, but i wanted a larger surface area to decorate in top, use first the smaller disc…


Then the larger


Construct your H pieces paying particular attention to the tabs and notches, the notches always face the top outside edge, whilst the tabs slot into the base. Glue securely to the large base circle ensuring all tabs are seated in the slots


This then slides over the central bolt and once located add the top cross piece making sure the tabs are securely located in the outer notches on those H pieces


I covered the floor if my stand in decorative paper, it’s a good tip to draw around the large circular base piece before construction, cut out then cut into quarters, remove roughly a centimetre square from the centre to allow to the central panel. Adhere with matte medium, sand edges when dry
I highly recommend decorating in this fashion rather than trying to cover the whole base with one piece as you do not want to obstruct the slots the H pieces sit in


Run 3mm red Liner tape along all outer edges of cross piece. I wanted lights on top of my stand too but didn't want the wires to run over the outer side edge so I  worked out, using a string of twenty lights would give me two bulbs for each inside wall, totalling 16 lights with four left over for the top
I needed to have the battery pack on top too so that it was accessible for switching in and off, so with the battery pack on top i thread the other end of the lights through the hole in the middle of the top circle and gently pulled  16 bulbs through


Remove tape backing and attach lights making sure that the bulbs just hang off the edge so that your top circle can still sit flush. 

Turn your paper covered circle over and glue to cross piece, avoiding the centre square that houses the bolt as we don't was glue to stop it spinning

 The top circle had been decorated in the same was as the floor, drawer round your circle into the reverse side of your backing paper, cut out, adhere with matte medium, leave to dry before sanding


I decorated the smaller disc too using paper from the same collection


I used sand texture past around the edge of the base so that it looked more finished and coordinated and used the same sand texture past through a stencil on top


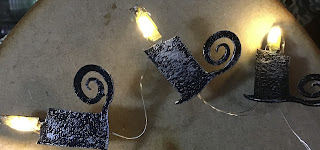
I painted the bases of four candles with black gesso and dry brushed over with titanium white acrylic to give a wrought iron elect and painted the flame yellow
 I then ran red liner tape up over the front of the flame and down the full back of the candle, repeat the process for all four candles


I attached the remaining four lights, one to each candle securing the wire down the back


I then was able to decorate each cubby with ephemera, die cuts, trinkets and resin pieces


I used texture paste and paint to create a stone effect on tombstone and added these to the top


I used Stamperia Alchemy papers and Tim holtz Halloween Quotes for additional decoration


I securely the battery pack discreetly behind on of the tombstones


Hope you like the finished effect


Have fun having a go at creating your own

I have used

Sandpaper
Redliner tape 3mm
Magik Graphics Dark Arts papers
Magik Graphics Alchemist Memoirs stencil
Stamperia Alchemy papers
Tim Holtz Halloween Emphemera


ROC TEAM MEMBERS

“Hex” Deck Saturday!

   I thought is would be fun to give our “Hex - Tech Tuesdays” a whole new meaning, so today I have for you all “Hex Deck Saturday” This pro...